![]() Using the Style Manager
Using the Style Manager
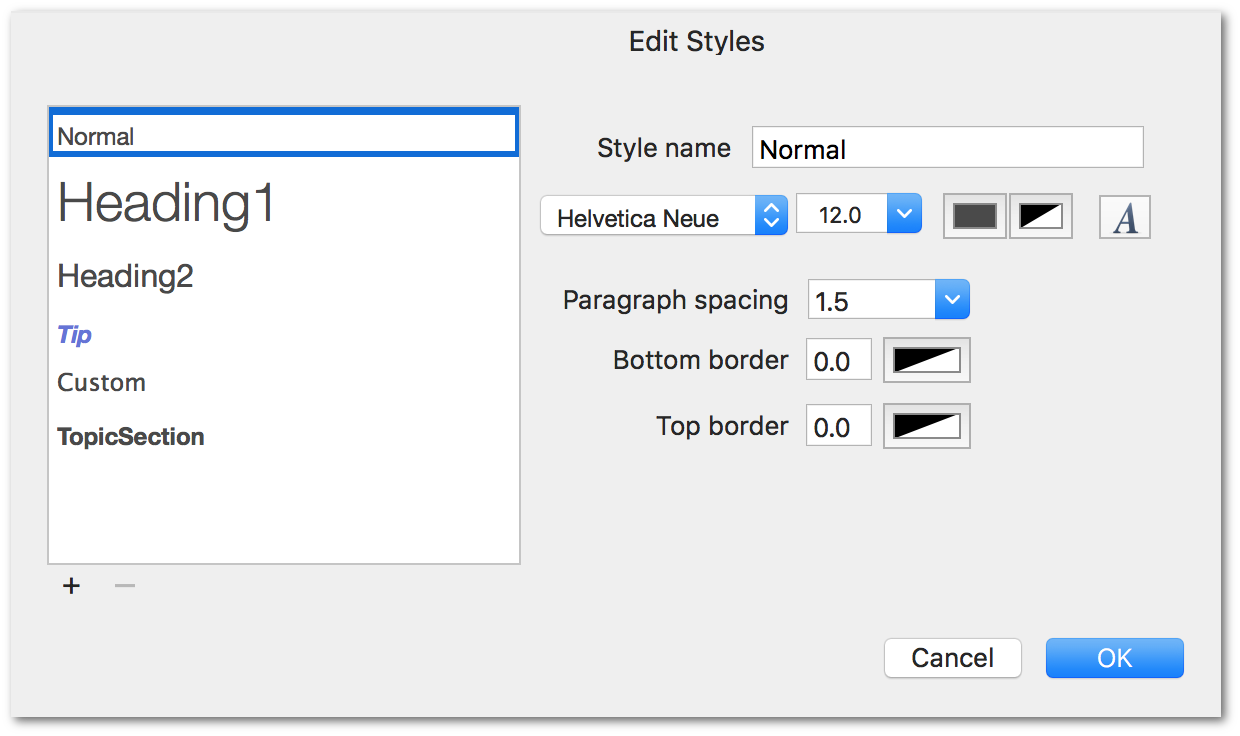
The Style Manager window is used to add, remove, or modify styles . To show the Style Manager, choose View > Style Manager from the menu, or press ⌘ 1.
Styles have the following characteristics, which can be changed in the Style Manager
The style name
The font typeface, weight, text color and background color
Attributes applied to the entire paragraph, including spacing between paragraphs, and borders
Tip: The drop down list of fonts only shows fonts that were widely available on Snow Leopard (OS X 10.6). Using these fonts will help make sure your help books are compatible from that version forward. You can select any font on your system by pressing the
 button to open the font manager. You should however make sure you test your help content on any versions your application supports.
To add a new style:
Click the + button
Enter the style name, and modify the font, paragraph spacing and border (if desired)
To remove a style:
Select the style you want to delete in the list on the left
Click the minus button
Tip: you cannot rename or delete the “Normal” style, since it is the default style for new text. You can make any other changes to it.
Select the style you want to modify on the left
Change the name, font, paragraph spacing and borders
Tip: Modifications to styles are not permanently modified until you press the OK button. If you press Cancel, the changes aren’t saved.
Copyright © 2015 - 2022 Putercraft LLC
Still need help? Please email us with any questions .